Many WooCommerce stores consist of products from multiple suppliers. Over time, these product offerings tend to change. New products are added, old ones deleted, and ongoing products evolve.
The ideal way of handling this situation is to automatically update your WooCommerce store using supplier data files rather than manually inputting/changing this data.
In this article, we’re going to do this using WP All Import — a top plugin which makes it very easy to Import and Update WooCommerce Products. To follow along, use this convenient sandbox feature and select WooCommerce Store as the demo type.
Bulk Importing New WooCommerce Products
Pretend that a new product supplier has sent you a list of products to add to your store, which you can access at this URL: https://drive.google.com/uc?export=download&id=1hiH7x1D8E6gLED6pwWw05Nnqf5MPQGN7.
Before importing this list, let’s examine its contents:

To keep this walk-through quick and simple, we’ve added just four new products. But the process would be the same to add thousands of products.
These products are all of the Simple product type but WP All Import also handles:
- Variable Products
- External/Affiliate Products
- Grouped Products
- Product Bundles
- Downloadable Products
- Virtual Products
Finally, the import columns contain simple values except these two:
- The Content column uses HTML to define the main description for each product.
- The URL paths in the Image URL point to an online image.
Let’s begin!
How to Import and Update WooCommerce Products:
Step 1: Import the New Products
In the WordPress main menu, go to All Import -> New Import:
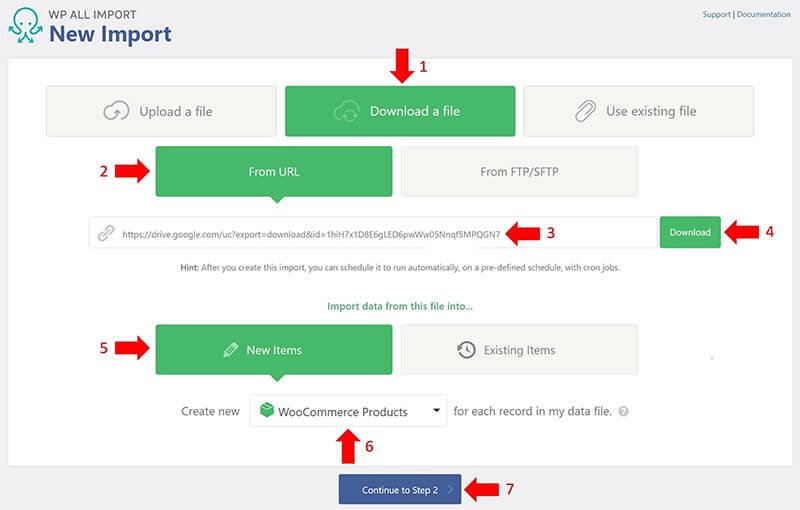
- Choose Download a File.
- Choose From URL.
- Copy and paste the URL https://drive.google.com/uc?export=download&id=1hiH7x1D8E6gLED6pwWw05Nnqf5MPQGN7.
- Click the green Download button. WP ALL Import will attempt to validate the file.
- After the file validation is complete, select New Items.
- In the Create new… list, choose WooCommerce Products.
- Click Continue to Step 2.
Step 2: Review the Product Import File
The Review Import File screen is used to verify that WP All Import has correctly interpreted the import file:
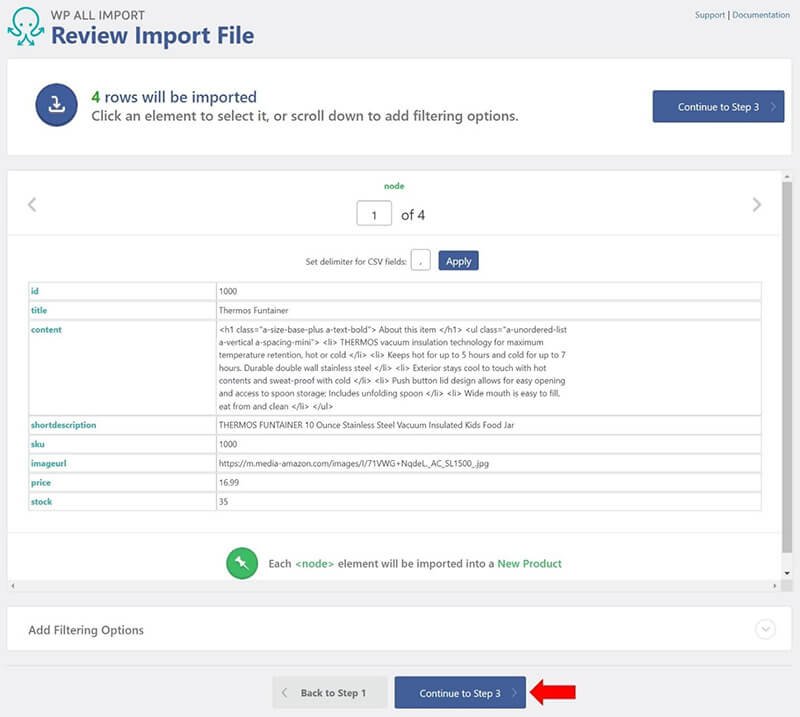
In this case, the four incoming records appear to be correct.
Click Continue to Step 3.
Step 3: Match the Incoming Columns to the WooCommerce Product Fields
The Drag & Drop screen lets you map the incoming data columns to the WooCommerce fields:
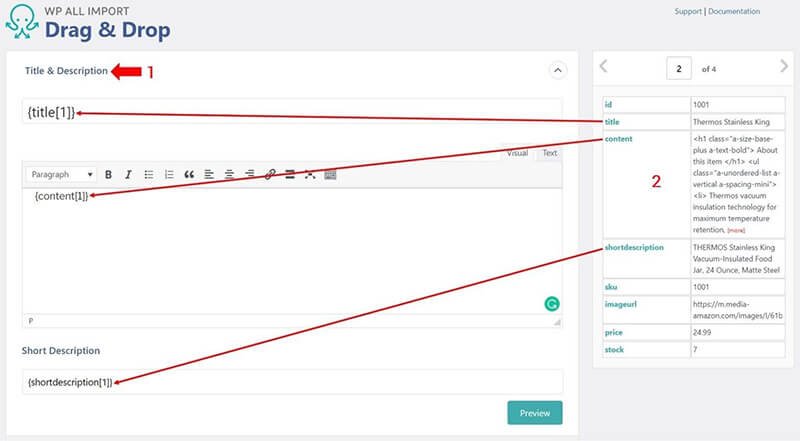
- Expand the Title & Description panel.
- Drag the title, content, and short description incoming columns to the fields shown above. Note that the column and field names don’t have to match. It’s the mapping that counts.
Collapse the Title & Description panel and…
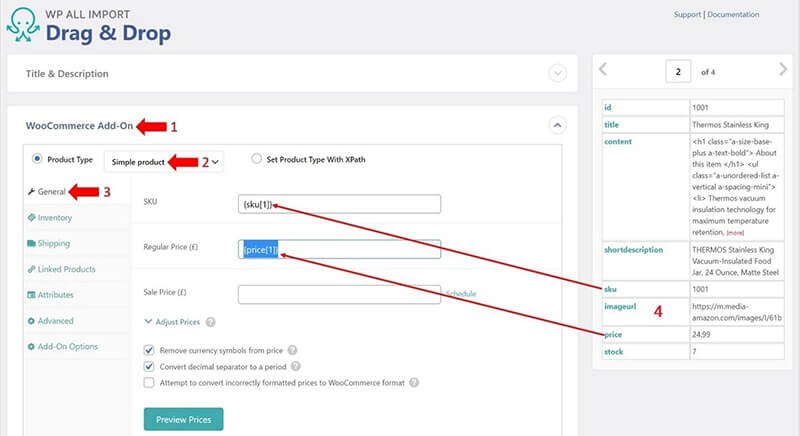
- Expand the WooCommerce Add-On panel.
- Set the Product Type to Simple product.
- Select the General tab.
- Drag the sku and price incoming columns to their WooCommerce target fields.
Next…
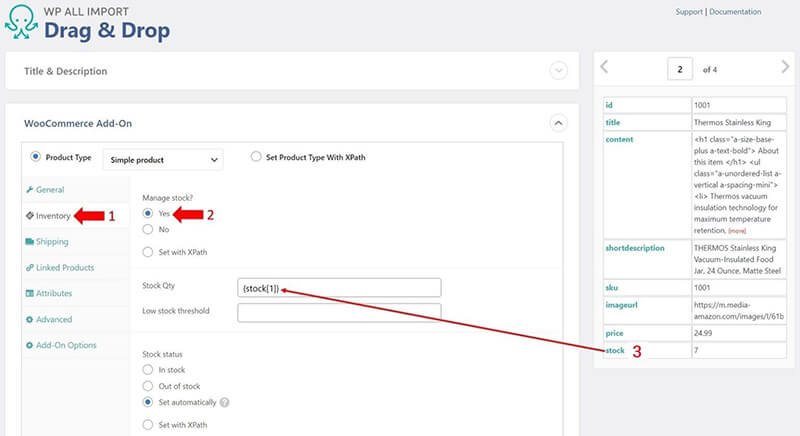
- Select the Inventory tab.
- Set Manage stock? to Yes.
- Drag the incoming stock column to the WooCommerce Stock Qty field as shown above.
Close the WooCommerce Add-On panel and…
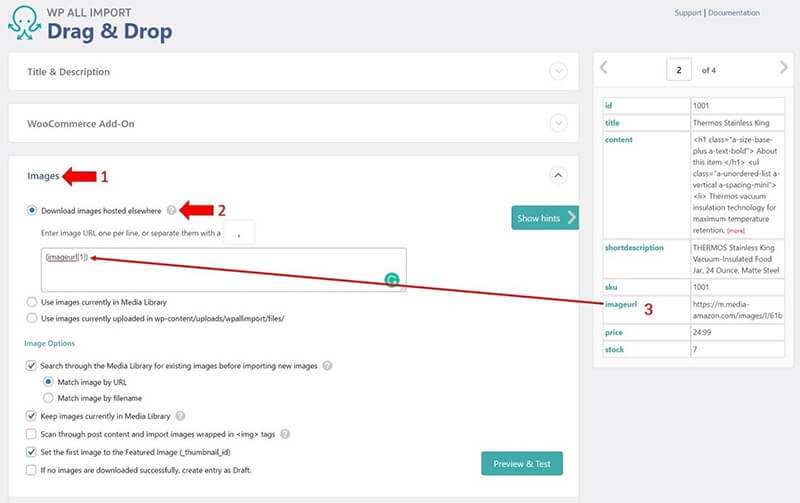
- Expand the Images panel.
- Select the Download images hosted elsewhere option.
- Drag the imageurl incoming column to the edit box as shown above.
When you complete these steps, click Continue to Step 4 to proceed to the Import Settings screen:
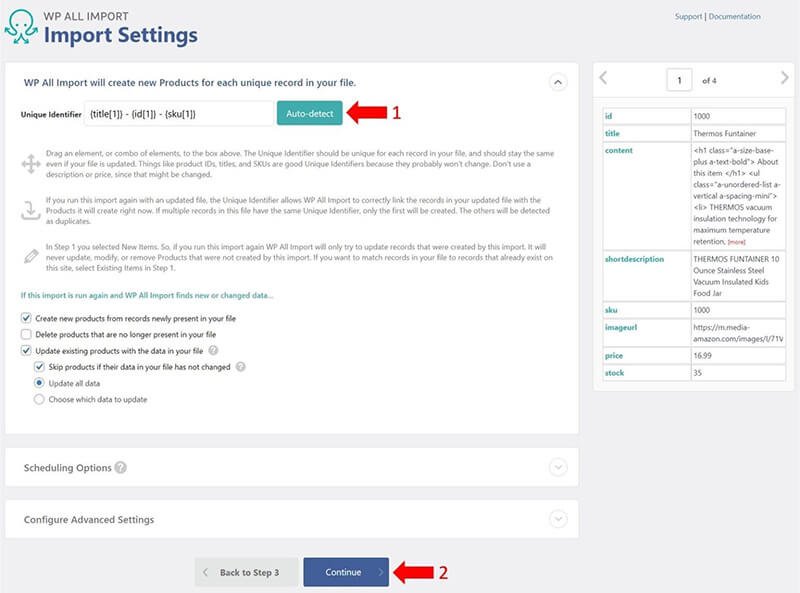
- Click the Auto-detect button. This identifies the combination of incoming columns that constitutes a unique identifier for the new products.
- Click Continue.
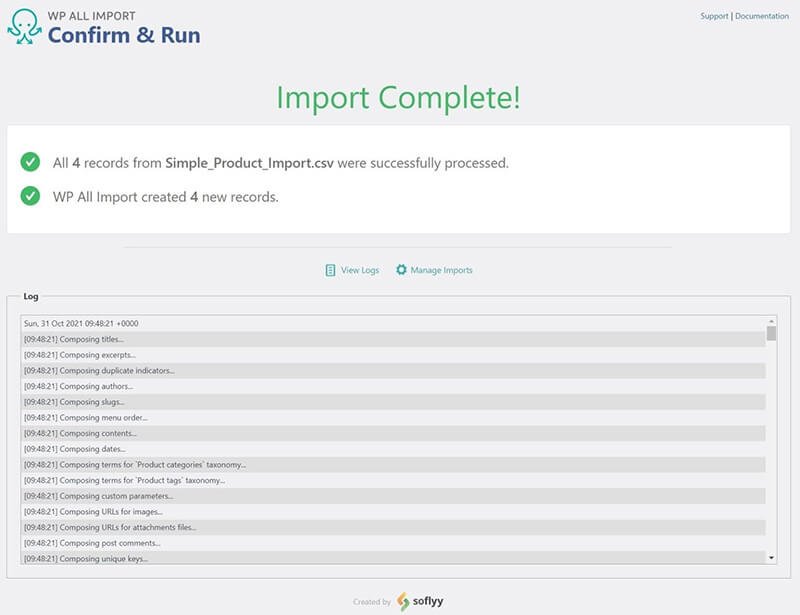
This will bring you to the Confirm & Run screen:
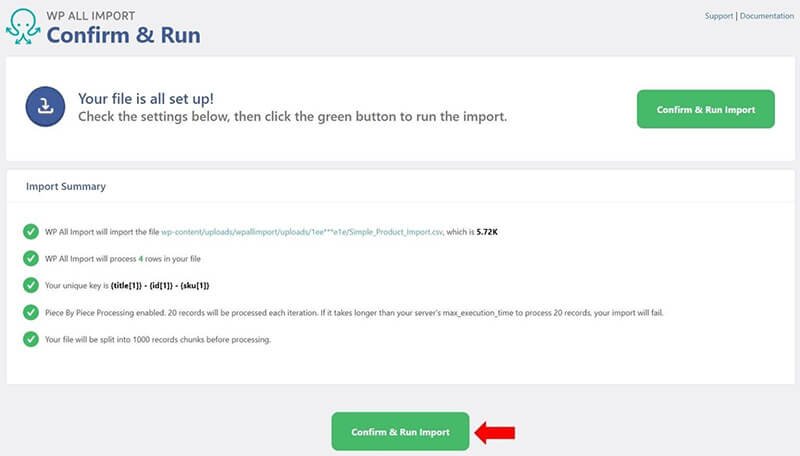
- You should see all green checkmarks. If so, click the Confirm & Run Import button.
This will start the import. When it completes, you will see this confirmation screen:
To verify that the import worked, navigate to Products -> All Products in the WordPress main menu.
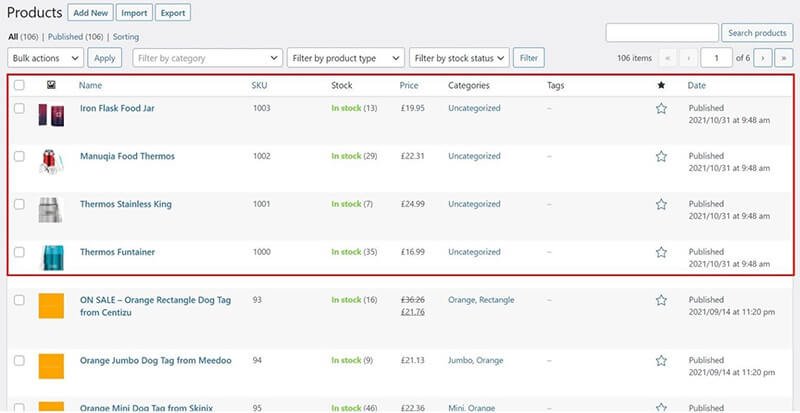
Your new products should appear at the top of this listing with correct names, SKUs, stock levels, prices, and images.
Hold your mouse over the Name field of one of the products in the above list and then click the View link when it appears. This will confirm that all the other data elements were also imported:
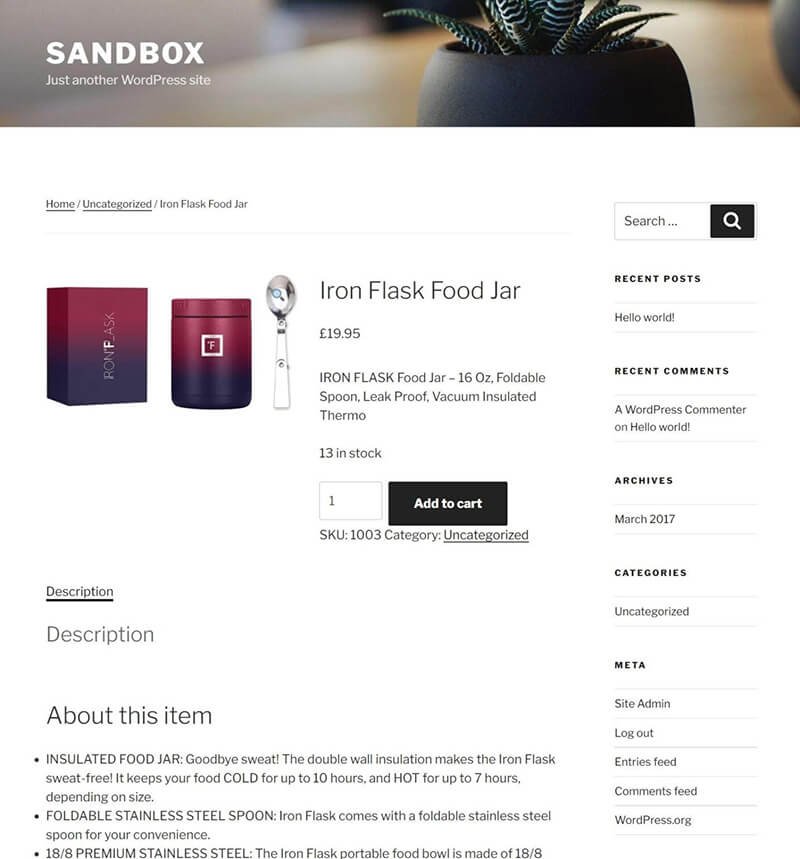
For more information on importing products, see Import WooCommerce Products from any XML or CSV.
Simple Updates of WooCommerce Product Data
Seven months after adding your new WooCommerce products, your supplier sends you a new product file URL: https://drive.google.com/uc?export=download&id=1E4h9vA7x2E0dqp_o_miD2baQvhTmiQ7Z.
This file contains the following:
- Three of the products you just created (IDs 1000, 1002, and 1003).
- A new product, ID = 1005, called the “New Stainless King”.
- Numerous price and stock quantity changes.
Note, also, that it omits ID = 1001, Thermos Stainless King.
Here’s what the file looks like:

How do you incorporate all of these changes into your WooCommerce store?
Luckily, WP All Import maintains a record of all previous data imports and exports, including the settings that were used.To see this, navigate to All Import -> Manage Imports in the WordPress main menu, hold your mouse over the import that you just ran, and click the Import Settings link when it appears:
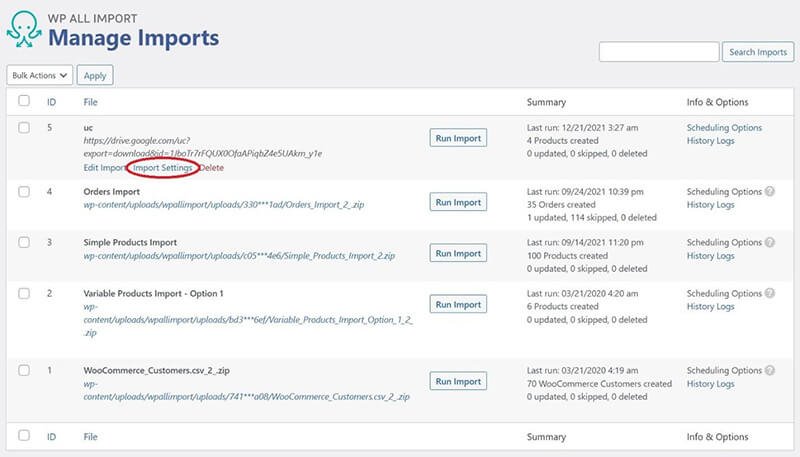
This will bring you to the Import Settings screen:
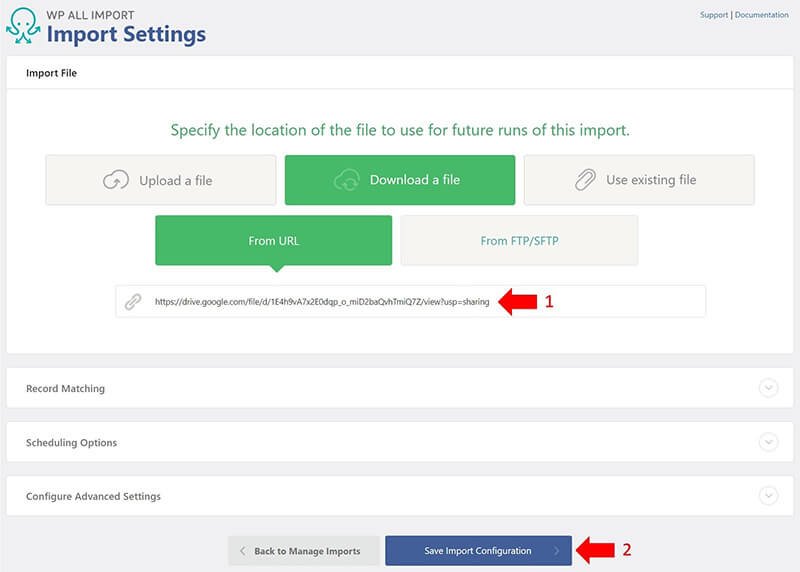
- Replace the original URL with the new update URL at https://drive.google.com/uc?export=download&id=1E4h9vA7x2E0dqp_o_miD2baQvhTmiQ7Z.
- Click Save Import Configuration.
This will return you to the Manage Imports screen:
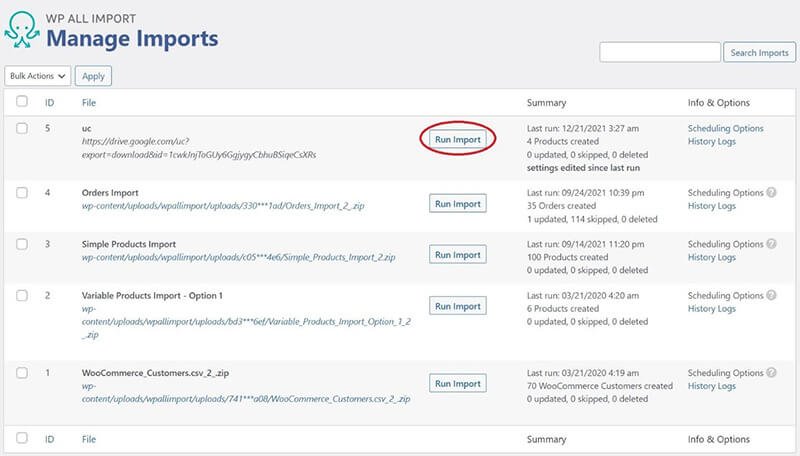
- Click the Run Import button for your import.
This will launch your import and place you in the Confirm & Screen. Here, just click Confirm & Run Import.What happened to your WooCommerce product data? After the import completes, go to Products -> All Products in the WordPress main menu. Your product listing should appear as follows:
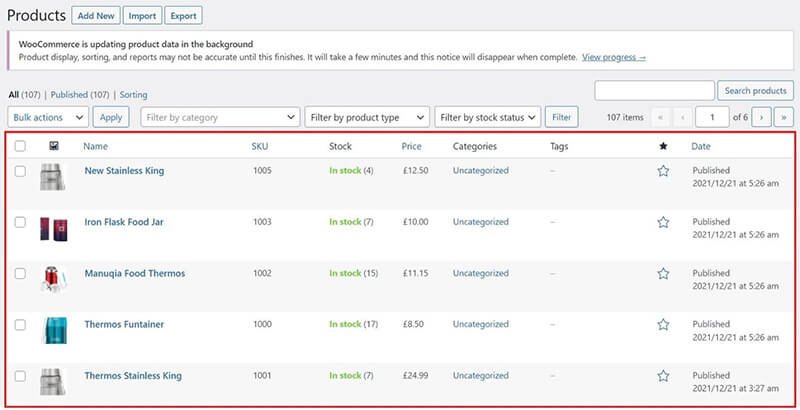
As you can see, SKUs 1000, 1002, and 1003 had their Stock and Price values updated.
The new product, SKU = 1005, was successfully added to the store.
And the product that was absent from the updated import file, SKU = 1001, was left completely alone. This makes sense because existing products may have sales transactions associated with them and shouldn’t be deleted without your permission
But this is just the default behavior. If you really want to take control of product updates…
Custom Updates of WooCommerce Product Data
In this section, we’re not going to do walkthroughs of all the examples because that would take too long. Instead, we’re just going to identify some of the more advanced update features.To start, navigate back to All Import -> Manage Imports in the WordPress main menu and again click the Import Settings link for your import:
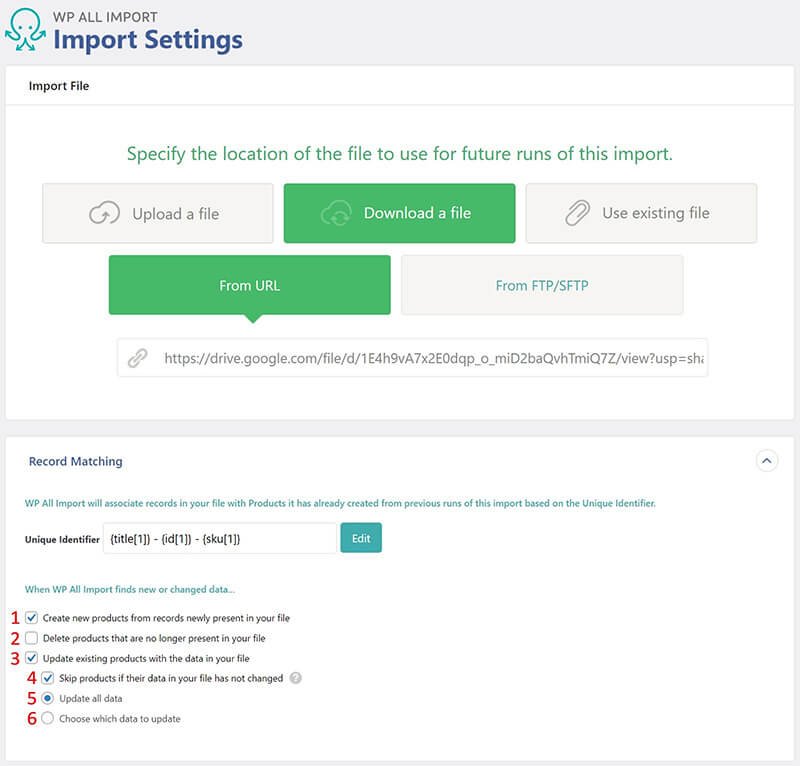
This time, focus on the Record Matching panel at the bottom.
The following settings explain WP All Import’s default behavior when updating existing data:
- Create new products from records newly present in your file. If checked, this does exactly as it says and is the reason that the new product, SKU= 1005, was created in the previous section.
- Delete products that are no longer present in your file. As you can see, this is unchecked, which is why SKU = 1001 was allowed to remain in your store even though it had been omitted from the update file. To have deleted 1001, you would have had to check this option.
- Update existing products with the data in your file. If checked, allows WP All Import to change information for existing products. This is what made it possible to update the stock and price values.
- Skip products if their data in your file has not changed. This is just an efficiency setting, as there is no point updating products if none of their data has changed.
- Update all data. This default updates all data for each product in the update file.
- Choose which data to update. This is where WP All import offers its full power/flexibility for product updates, which will describe next.
Controlling What You Update
Click on the Choose which data to update option in the preceding screen. The Record Matching panel will expand as follows:
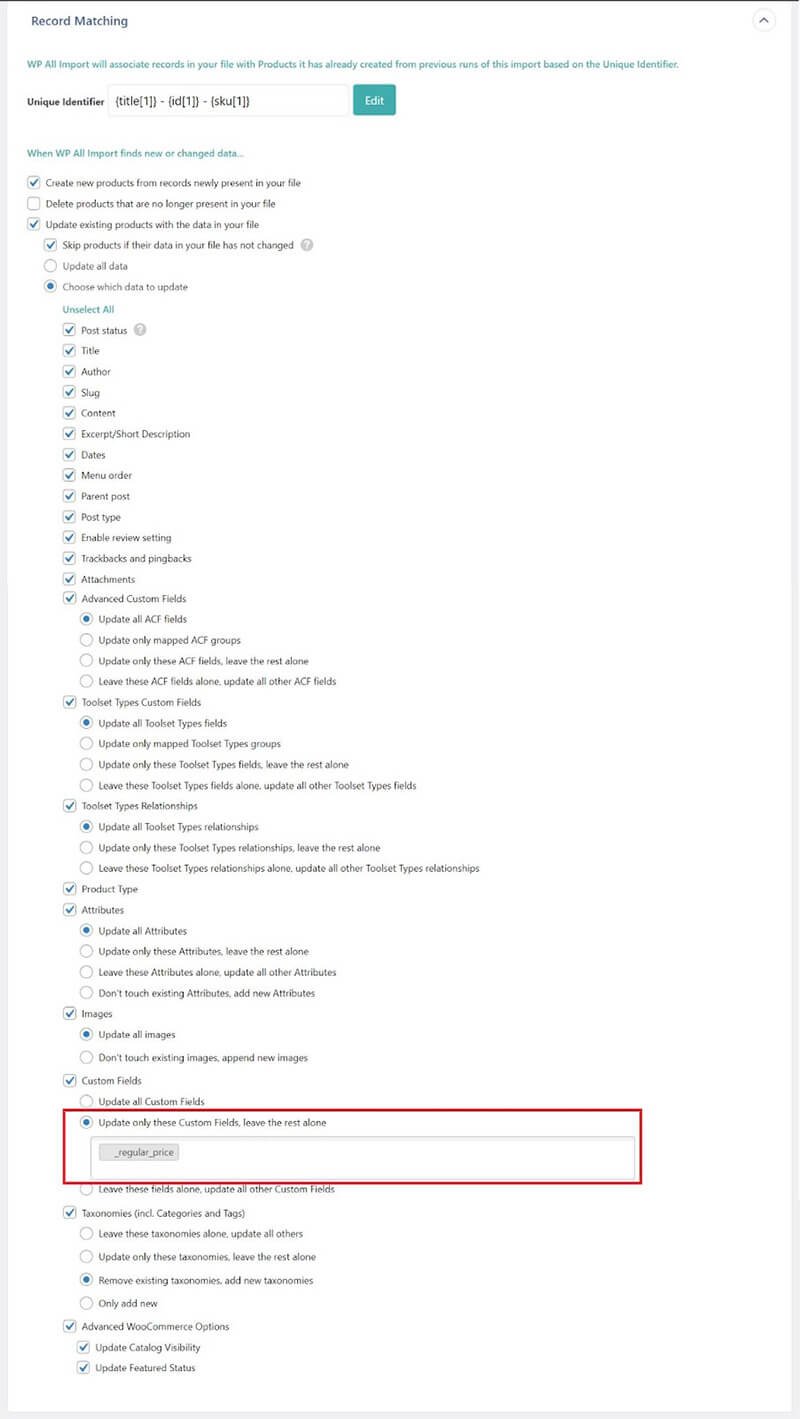
As you can see, this screen allows you to control what happens to every possible data element during an update.
We can’t possibly walk through all of these options, so will give you just one example. Focus on the section outlined by the red box. This is the Update only these Custom Fields, leave the rest alone option inside the Custom Fields section.
WooCommerce stores many of its key values, such as stock quantity and price, in custom fields. By specifying that WP All Import should only update the _regular_price field, this means that the stock custom field should not be updated. If we had applied this setting to our previous update, it would have changed only the price of the existing products and not their stock levels.
If you look immediately below the red box, the Leave these fields alone, update all other Custom fields setting allows you to take the opposite approach, i.e. to protect specific fields from updates while updating all others.
This same level of granular control is available for many of the options in the Record Matching panel. If you want to take things even further, you can use WP All Import’s built-in PHP function editor to apply conditional programming logic to virtually any field in your update.
This is why we view WP All Import as the best data import/export plugin for WordPress/WooCommerce. It allows you to tackle simple tasks like import and update WooCommerce products in seconds using a drag & drop interface, and also to handle complex tasks by going as deep into the weeds as possible.
Related Information:
How to Import/Export WooCommerce data such as Customers, Products, and Orders