Adding slides to the Albar default slider
This slider is very basic and only does one simple animation slide unless you upgrade to premium then you can select between 3 different slide transitions.
To add slides to the slider you’ll need to start by creating a new Post category for the slider, this you’ll do under Posts -> Categories.
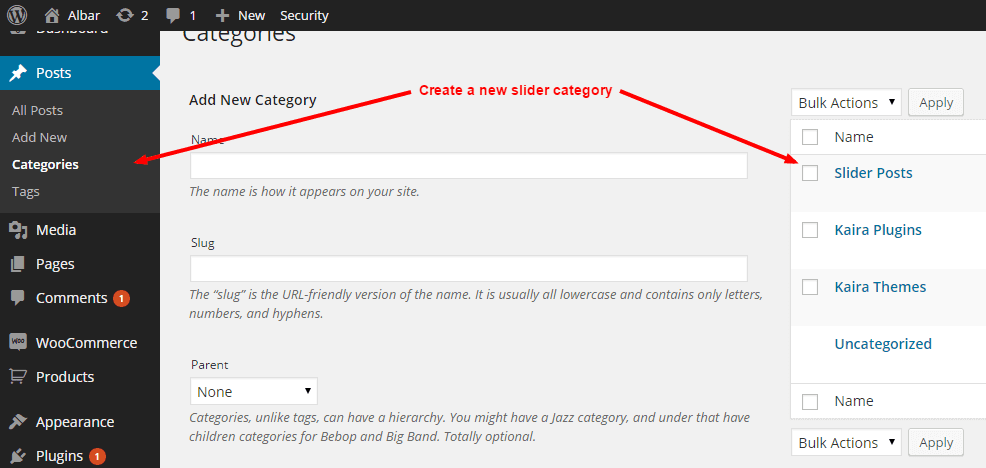
Once you’ve created the new category for the slider, you can click on the title of the category and it’ll go into that categories page.
Then you’ll find the ID for your new category that you’ve just created in the url bar of the browser.

Copy this ID and then go to Appearance -> ALBAR Settings and enter this category ID (Eg: ‘204‘) into the slider categories input provided under Slider Options.
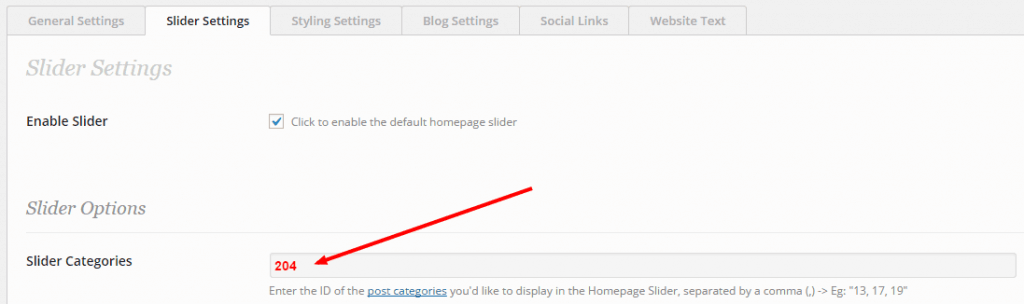
Now you’ve created the slider posts category and you’ve specified that the slider must use the posts in that category.
The slider will still not be showing any slides yet because you still need to create the Slider posts.
To create your first slide, go to Posts -> Add New.
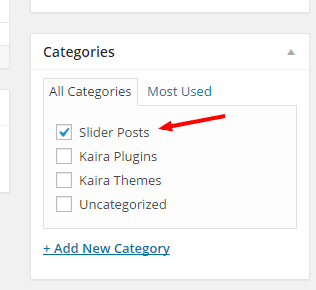
The slider only uses the ‘Title‘ and the ‘Featured Image‘ of the post.

Then for the posts to show in the slider you need to tag them into your new slider category that you created.
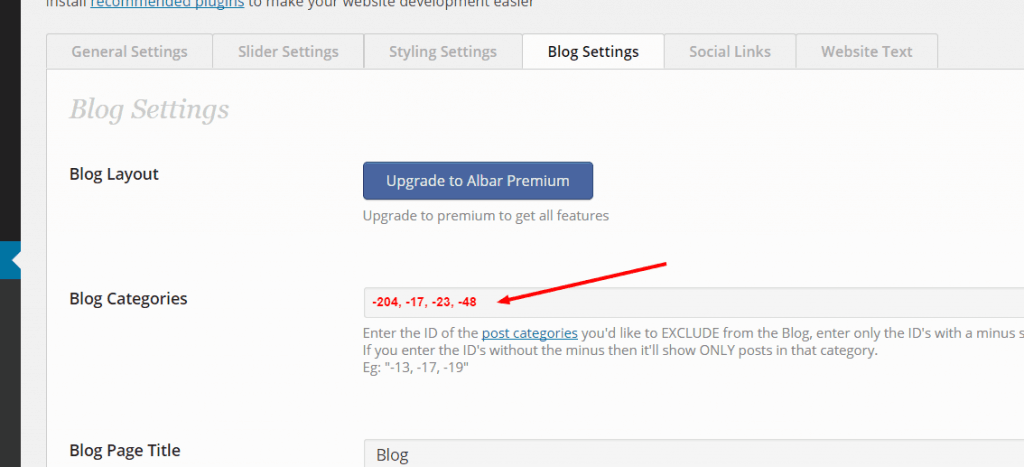
Removing the “Slider” category from the blog list.
This is optional of course, but guessing that you don’t want the slider posts to show up in the blog list, you can simply add the same slider ID to the “Blog Categories” input, but to make it not show the added ID’s you need to add a minus sign ( – ) before the ID. Eg: “-204, -17, -23, -48“.
You can add multiple ID’s separated by a comma (,) with a minus to remove multiple categories from the blog list.
Or, if you add multiple ID’s, separated by a comma (,) without the minus sign, then the blog list will show only the posts in those categories.
Eg: “204, 17, 23, 48“.