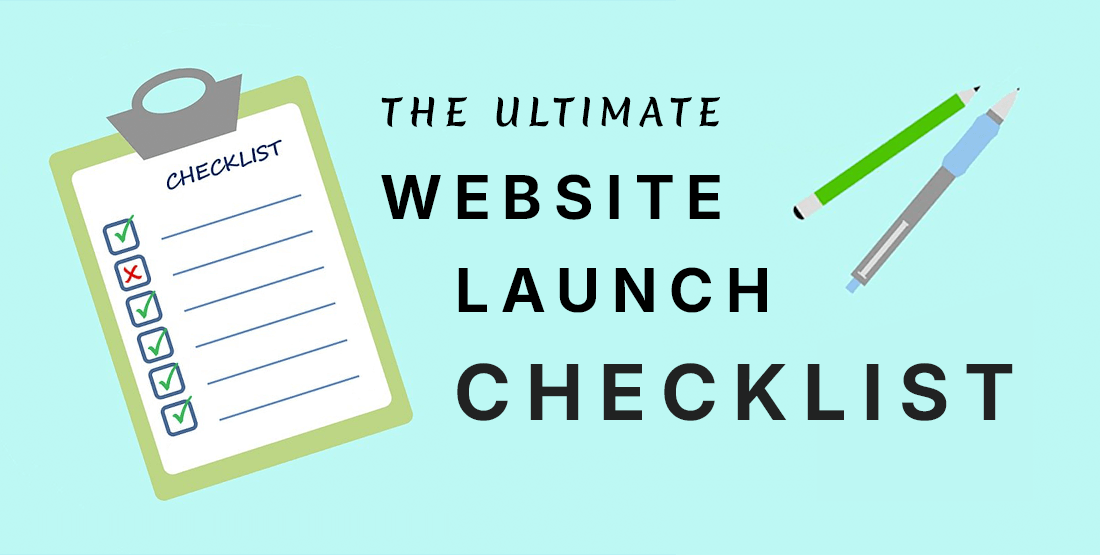
Launching a website is exciting! But if you miss a step, it can lead to broken links, SEO issues, or lost traffic.
Whether you’re launching a business site, blog, or online store, this website launch checklist covers everything you need to do before going live. From technical checks to SEO, performance, and design, this guide helps you launch with confidence in 2025.
I’ll recommend the products I trust and use myself, and also the truth on why your website might not start making money right away.
Follow these steps in our ‘website launch checklist’ before going live to avoid costly mistakes and make a strong first impression.
Also, have a look at our Smart Website Launch Kit, for downloadable checklists & copywriting PDFs to help you launch successfully.
Pre-Launch Website Checklist: Why a Website Launch Checklist Is Essential
Before hitting that “Go Live” button, there are several crucial elements to consider to ensure your website runs smoothly, looks professional, and serves its purpose effectively.
From domain purchase and website hosting setup to SEO, site design, and functionality checks, careful preparation can make all the difference in a successful website launch.
In this ‘website launch checklist section, I’ll cover some key points that you should plan before launching your website to maximize your site’s impact.
Plan Your Website Structure & Purpose
Before purchasing a domain and hosting or installing WordPress, let’s take a moment to plan your website’s structure. This will ensure that you don’t spend any money upfront before you know what you’re actually wanting, and that you’ll be able to make the most of any free trials on hosting or WordPress plugins that you may use the pro version of.
Let’s start with thinking of a (domain) name for your business, the url that people will visit to view your website (like mine… kairaweb.com)
After you’ve decided on a domain name for your site, you can check with any hosting provider if the domain name is available. While you can purchase the domain and hosting at separate companies, I recommend purchasing the domain name with the same hosting provider that is going to host your website, as this will keep things simple using one hosting company, and then you won’t need to fiddle with the DNS and more advanced settings with regards to your website hosting.
Next…
Recommendation: I can honestly and very confidently recommend you go with Hostinger for your WordPress hosting. I’ve recently moved all my websites (Over 10 sites) over to a Hostinger dedicated hosting and I really couldn’t be happier. Their hPanel is intuiting and very simple to use, and they have the best pricing for managed WordPress hosting.
Once you’ve chosen a hosting provider, then you can get started with:
Set Up WordPress Hosting & Install WordPress
One very crucial part of the ‘website launch checklist is choosing the correct hosting provider!
You want website hosting that is fast, has reliable uptime, offers FREE SSL, and helps to protect your site from cyber threats, data breaches, and downtime caused by malicious attacks.
As mentioned above, I recommend Hostinger hosting, as they offer a great service providing all of these, as well as top quality support, meaning theres someone who can help with any issues you may have, at any time!
Carefully consider your hosting options before launching to make sure you set your website up for success!
Ok, so you’ve just bought your domain, you have 2 options here:
Setup Hosting with your current registrar:
Check that your current registrar offer WordPress specific hosting, and also make sure they offer FREE SSL, and other good features. If they do a good job then stay with them, you could always change hosting at a later stage if you are not happy with your current hosting provider.
Transfer your domain to a new hosting:
I recommend transferring your domain over to Hostinger, their hosting panel is very easy to use and they’ll even help for FREE to migrate your domain (or a full website) across to their servers.
Great!
Let’s start building your website!
Not sure you’re happy and want to move?
If for some reason you decide that you are not happy with your current hosting provider, you can very easily move to a new hosting.
I recommend installing the Duplicator WordPress plugin and downloading a backup of your website, this is a great plugin for manual backups or migrating your website over to new servers.
Then contact Hostinger and ask them to migrate your website over to their servers.
I’ve recently moved over 10 websites to their hosting and am very happy I did… They really offer a great service!
Not a problem!
Go to the Hostinger website and take the Premium Package for $2.99 per month.
You’ll see the package can hold up to 25 websites, this is the best pricing offered for multiple websites, even if you don’t need more than 1 website, it’s nice to have the option for more sites… Who knows, maybe you come up with a new site idea at a later stage.
Once your Premium package is setup, you can get a FREE domain (for the 1st year) with your hosting, setup WordPress in just a few clicks and start building your website!
Please ensure that your hosting fits within your budget, and includes:
- A free SSL certificate ( Google requires SSL for ranking your website
- Offers WordPress installs (most companies offer this nowadays)
- Website Backups
- 24/7 customer support
Note: ‘Admin’ is the most used default username for WordPress so hackers / bots already know half your login details is you use ‘Admin’.
Setting up WordPress should just be a 1 (or very few) click to install and setup the database and WordPress backend.
Your hosting provider should also manage that your website is forced to use SSL and that your domain name is connected to your hosting, so that you can setup a live url (a staging url or a production url) and start building your website.
Configure Your WordPress Dashboard & Settings
While WordPress is a powerful (in fact, THE most powerful) and flexible content management system (CMS) out of the box, it still requires some further optimization to perform at its best in terms of speed, security, SEO, and user experience.
When setting up WordPress, the installation process does make you setup some details, but I’ll take you through the steps on finer tuning some of the settings after your initial setup for optimal performance.
A Maintenance Mode plugin (or Under Construction, or Coming Soon) is a useful plugin for adding a splash page while you’re building your website.
It’s so that users don’t visit your website while you are busy building it.
Now that your site is hidden from search engines and cannot be viewed, let’s carry on configuring the rest of the WP Dashboard settings.
It’s advised by WordPress Site Health to always keep 1 default theme installed with your chosen Theme (we’ll get to this in a bit).
Google prefers pretty urls so make sure to change your urls to use a better looking permalink structure. I always recommend using the “Post Name” structure for your website (/post-name/ instead of ?p=123), which improves your site readability and indexing.
This was probably done automatically when installing WordPress, but have a look over it and make any changes if you’d like to.
Next, just setup the initial pages so they are ready for when you start building your website. You don’t need to build the actual pages yet, we are first going to go through choosing a theme, adding the necessary plugins and building a header and footer before we get started on building each page.
Choose a WordPress Theme: Design & Customize Your WordPress Website
The WordPress Theme you choose dictates your website’s design, user experience, and also some of the performance, by controlling how content is displayed, how your users interact with your website, and how efficiently it loads.
Choosing a good WordPress theme is very important, also… It needs to be mobile responsive and Google now looks at mobile first and then desktop.
Here’s a deeper look at each aspect:
Theme Design
Your chosen WordPress theme defines your site’s visual appearance, including typography, colors, layout, and overall structure. A well-designed theme ensures consistency and a professional look.
User Experience & Responsive
Your theme affects navigation and usability. Features like mobile responsiveness, accessibility, and intuitive layouts enhance engagement, while poor design leads to confusion and higher bounce rates.
Speed & Performance
A theme’s code impacts speed and performance, which then effects SEO. Lightweight, well-coded themes load faster, while bloated themes slow your site down. Optimized themes improve search rankings and user experience.
Why It Matters
Choosing the right theme ensures a balance of aesthetics, usability, and efficiency, helping create a high-performing website that engages visitors and ranks well in search engines.
Recommendations:
With over 15 years of experience in the WordPress industry, I’ve had my share of working with many different themes, as well as building my own WordPress themes which I release on the WordPress directory.
I can recommend a few different themes which I know are very good themes.
I suggest using one of the themes below, have a look at all of them and decide which is best for you:
Any Kaira Themes
Use any of our Kaira Themes that we’ve released on the WordPress directory. They all offer a free version to get you started, they are super simple to configure and build the website you want.

Building with Elementor
Elementor took the WordPress world by storm a few years ago, and they’ve only built great products since. They offer their own page builder which is easy to use and great for performance.

Avada WordPress Theme
This is a very popular WordPress theme. They offer good design which is quick to setup with 1 click installs, and they focus on performance, so it’s a very fast theme too.
Ok… Back to the todo list!
Next we’ll setup some theme basics.
You’re theme will offer a bunch of settings to select the colors to match your branding, select which fon’t you want to use for the headings and the main body fonts, and I suggest you do these before building your header and footer for the website, as the header and footer are displayed on every page and is your users main source to navigating around the website.
Often a theme will give you a selection of pre-designed headers and footers to choose from, otherwise you can always build your own.
Main elements which are recommended to be in the header and footer are your logo, main navigation and possibly social links to your different social profiles.
Then… you can even start building the different pages of your website, I usually recommend starting with the about and contact pages, as these are easy to build because they usually have default content on them such as an about paragraph with an image, contact details an a contact form, and even display maps for your users to easily find your business.
The home page is usually an overview of each section which links to each page. Internal linking (to page in your site) is very important, but we’ll get to that in the SEO checklist section.
Install Essential WordPress Plugins
WordPress Plugins ! Very important in the website launch checklist !
My advice on this section is: Try to not install too many plugins… This is important to mention in the ‘website launch checklist, because each of the plugins installed (free or premium) are built by different developers and they are done in their own way, so this can lead to plugin conflicts, or functionality or design breaking on your website.
I’ve worked with many different plugins over the years and I’m going to recommend only the essentials plugins here that I think your website definitely needs!
For any other functionality you can read my Recommended WordPress Resources page, or if choosing your own plugins, i highly recommend spending some time reading the reviews and star ratings for each WordPress plugin.
Essential WordPress Plugins You Will Need:
There are a few out there… But I only recommend 1 SEO plugin… Rank Math SEO, it is definitely the best plugin for improving website SEO. Start out with the free version, but Rank Math Pro version offers even more if you really want to boost your site rankings and master your website SEO. From only $6.99 per month.
Google Site Kit is the best plugin for seeing your website traffic, and it’s super simple to install and setup. Google Site Kit is FREE.
Images are often the main culprit behind slow-loading websites, affecting user experience and SEO. Unoptimized images increase page load times and bandwidth usage. By compressing and converting images to efficient formats like WebP, you can speed up your site without sacrificing quality. Optimized images improve performance, boost rankings, and create a smoother browsing experience.
For free image optimization you can optimize images to the correct pixel sizing using Canva or Photoshop, save them to the correct format (usually .jpg or .png) and then compress them using a site like TinyPNG. This is a little more time consuming, but it will really help.
For images to be auto-optimized as you upload them, I recommend Image Optimizer by Elementor.
While your hosting may offer backups, it really does give peach of mind knowing you have your own backups on your website running too. For this I recommend the Duplicator WordPress Plugin for creating manual backups on your website whenever you make changes. It also makes migrating a website super quick and easy!
Duplicator Pro offers scheduled backups to cloud storage (Google Drive, Dropbox, etc) for only $49.50 per year.
Caching helps your website load faster by storing and reusing data instead of reloading everything from the server each time. This reduces the work your website has to do, making pages load quicker for visitors. Hostinger, as recommended above, offers built in caching & CDN for speeding up your website.
Your hosting is probably offering great security, but adding s security plugin can add an extra layer to protect your WordPress site by blocking threats, scanning for malware, and preventing unauthorized access.
Final Pre-Launch Testing
Before going live, do some of these final tests to ensure your website is ready for launch.
✔️ Check the favicon is displayed correctly
✔️ Run a final speed test before launch
A favicon is a small icon that appears next to a website’s name in browser tabs, bookmarks, and search results. It enhances brand recognition and professionalism. WordPress asks for an icon 512px by 512px in size.
If you’re not sure how to create your own Favicon, you can always use this FREE Favicon Generator. This will give you a “android-chrome-512×512.png” file to use, which you can rename and upload as your site Favicon.
Then…
And… Do not forget the next one…
…Ready!
Alright… Click to set your website live!
Got any traffic yet?
Damn… Ok wait… There’s more for us to do! Let’s keep going.
WordPress Post Website Launch Checklist:
In the next ‘website launch checklist section, I’ll take you through what to do once you’ve set your website live.
We now need to ensure Google and other search engines can find it on the internet, and also make sure they like it.
Activate Analytics, SEO & Improve Performance
Previously we installed some plugins that we’re left deactivated… Once your site is live, we can now activate them to setup the analytics, extra security and caching for performance improvements.
The Rank Math plugin will generate a sitemap.xml file for your website and store it on your server. A sitemap is what search engines like Google use to crawl and re-crawl your website for indexing.

Copy this sitemap URL and go to Google Search Console, as mentioned earlier in this article, you will need a Google account to login, and then go to “Sitemaps” and enter your sitemap.xml URL.

Google’s indexing process can vary, but it will generally take a few days to a couple of weeks for a new website or new pages or posts to be indexed and appear in Google’s search results. But at least now you’ve sped up the process to Google finding your website.
Then next…
Publish High-Quality Content
Well done! Your site is now live, congratulations on some great work!
Here are just a few todo’s to remember when building new pages or writing new blog posts for your website.
Adding comments to your website is only recommended for blogs, I always disable comments completely as it’s more to manage, and anyway… If you’re building an informational website or an online store, you most likely don’t need comments. Use this plugin to disable comments on your WordPress website.
Always check your new posts or pages on the website frontend to ensure they look good and are easy to read.
How Much Does a WordPress Website Cost? A Complete Pricing Breakdown
The cost of building a WordPress website can vary quite significantly depending on your website needs, goals you want to achieve, and depending on the features you want to add to your site..
Whether you’re launching a simple blog, a business site, or a full-fledged eCommerce store using WooCommerce, the can range from low to high. Factors like Website hosting, themes, plugins, custom development, and ongoing maintenance all contribute to your final price.
I’ll give you a break down the costs you need to take on, and extra costs or added plugins that I’d recommend you use.
WordPress Website Costing Options:
I’ve built 2 ‘lowest possible’ costing options for you below, please read through the notes and pricing and see which one fits you best.
Cost of a WordPress Website with Hostinger
| Product / Service | Cost Range (USD) | Notes |
| Domain Name | FREE with Hostinger | Usually costs around $16 per year |
| Web Hosting | Starting at $2.99 per month | You can pay for a few years up front |
| WordPress Theme | Free | Using a Kaira theme |
| Blockons Pro – Builder Blocks | $29 per year | Blockons Pro gives you contact forms, maps and other advanced blocks for your website |
| Rank Math Pro – SEO | $6.99 per month | Recommended for SEO |
Extra Notes: Your WordPress hosting cost is upfront for 1 – 4 years, you can choose… Note that it does renew at the normal pricing which is still cheap, but by then your business should be making money and absorbing this as a business cost.
You’ll probably have an upfront cost of around $72 (Hostinger – 2 years) + $29 (Blockons Pro – Advanced Builder blocks for WordPress) + $96 (Rank Math advanced SEO for your site… Giving you a total of just under $200.
So your total costs work out to $14 per month… For running a online business… that is super affordable!
OR
Cost of a WordPress Website with Elementor
| Product / Service | Cost Range (USD) | Notes |
| Domain Name | FREE with Elementor | Usually costs around $16 per year |
| Web Hosting | Starting at $4.99 per month | Billed Annually – You pay $60 |
| Elementor Hello / Biz Theme | Free | Free on WP Directory |
| Elementor Pro Builder | Included in Hosting | Includes everything needed to build a site |
| Rank Math Pro | $6.99 per month | Recommended for SEO |
Extra Notes: I recommend starting with the Essential hosting plan ($4.99 p/m) for a normal website, or the Advanced Solo Plan ($6.99 p/m) for an online store as you’ll see the different features included there. You can always upgrade further if you decide you need more.
Your costs with Elementor will be $60 (for annual Elementor hosting, including page builder) + $96 (Rank Math advanced SEO for your site… Giving you a total of about $160… Which works out to about $14 per month too.
Very affordable for running a new online web business!
Website Launch FAQs – Everything You Need to Know Before Going Live
Launching a WordPress website comes with a lot of different moving parts, and it’s pretty normal to have a few questions.
Below are some of the most common questions people ask before launching their website, with quick answers to help you feel confident and prepared.
What is a website launch checklist?
This website launch checklist is our step-by-step guide used to ensure your website is ready to go live.
It typically includes tasks related to design, SEO, performance, mobile responsiveness, backups, and functionality testing, all to avoid issues post-launch.
Why is a website launch checklist important?
It’ll make sure that you avoid common mistakes like broken links, slow load speeds, or missing SEO tags.
A good checklist ensures your site is fully functional, optimized, and secure before it’s available to visitors.
What should I check before launching a WordPress website?
Key things to check include:
- Mobile responsiveness
- SEO settings (titles, meta, sitemap)
- Page speed performance
- Contact forms and links
- Backup and security plugins
- Analytics and tracking setup
Please read our full article for more on each of these points.
Do I need technical skills to launch a WordPress site?
Not necessarily!
With the right checklist and user-friendly tools or plugins, you can launch a WordPress site without coding knowledge.
Many tasks can be done using visual editors and free plugins that we recommend.
Can I use a pre-launch checklist for any type of website?
Yes!
While this checklist is focused a little more on WordPress websites, most of these steps (like SEO setup, design checks, and testing) will apply to all website platforms… Whether you’re launching a blog, business site, or online store.
Conclusion: Launch your WordPress website
I hope this post has been useful in teaching you a little about finding the right hosting provider, getting all the needed basics setup, and that it’s taken you all the way through to launching your online project with success.
If there’s anything you get stuck with or need further help, please don’t hesitate to get in contact!
All the best!