Before going into details about Overlay with Cloudways, and the functionalities and advantages of the Overlay theme for WordPress, I would like to show you a staggering statistics. Today, WordPress offers more than 31,000 themes from 200+ companies.
Well, that’s an astonishing number.
Overlay is one of the newest themes available to WordPress users, and it has already taken the market by storm. It has already got more than 1000+ installations. The developers have built this theme with a prime focus on speed and performance for websites and ecommerce stores.
This theme optimizes the overall operations of a WordPress website. To properly optimize your website, you must know what type of hosting duly fits your website’s requirements. This is where we recommend Cloudways Hosting.
Setting up a Server to Deploy the WordPress Application
In this fast-paced world of technology, efficiency is the key to success. With time being a scarce commodity, it’s important to know for business owners what operations to outsource and what not.. This also holds true when it comes to managing a website or an online store.
To save business owners from investing too much effort in tackling the hassles of server management, there are many managed cloud hosting solutions available to take advantage of. Amazon Web Services provides Elastic Cloud Computing (EC2), a server that can be used to deploy applications. AWS is a high tier cloud service provider and the pioneer in cloud computing. It’s price tag for the service reflects the vast cloud infrastructure it can support.
rt.
DigitalOcean is another cloud hosting provider that caters to the needs of developers, offering a variety of features. It does this by simplifying the server management and hosting mechanism to their needs of giving the option of an SSD hard disk in their server machines. From the price point of view, they’re more affordable but lack the sophisticated cloud infrastructure AWS offers.
I found this article to be helpful in trying to understand the comparison details between DigialOcean and AWS on host advice.
For people who want to outsource server management operations, we have got a managed cloud-hosting solution.
Choosing a Managed Hosting Platform
When choosing a managed cloud hosting provider, we strongly recommend WordPress hosting. I found the interface to be simple and intuitive, so I was pleasantly surprised when I first logged in.
I had the option of choosing between DigtialOcean, Vultr, Linode, AWS, and Google Cloud Engine – all within the Cloudways platform. The chat support came in handy when I wanted to clarify a few queries about their service.
Cloudways offers many features for non-technical business owners to try out the platform. With server management technicalities taken care of, the business owners can focus on other business operations without hiring any system admins.
Check out the table below. It highlights the salient features of Cloudways platform.
| Server Management | Application Performance |
| Renowned IaaS Providers | Dedicated Environment |
| Block Storage | SSD-Based Hosting |
| Seamless Vertical Scaling | Built-in Advanced Caches |
| No Long-Term Contract | PHP 7 Ready Servers |
| Launch 10+ Apps Through 1-Click | CloudwaysCDN |
| All PHP Apps Supported | Free Magento Full Page Cache |
| Multiple PHP Versions | Pre-configured PHP-FPM |
| — | HTTP/2 Supported Servers |
Now that you understand the need for server hosting, let’s dive into installing the self-hosted WordPress application. This is because my theme runs on the WordPress application, it’s important to deploy the application in order to make the theme work.
I chose Cloudways to handle my server management, as it makes it easier to install the WordPress application. The steps involving setting up the server and deploying the application takes under 10 minutes. This is why I recommend signing up and using Cloudways.
How to Install WordPress on Cloudways
Installing WordPress on Cloudways platform is extremely simple. I’ve explained the process through screenshots that should be easy to follow and will get the ball rolling.
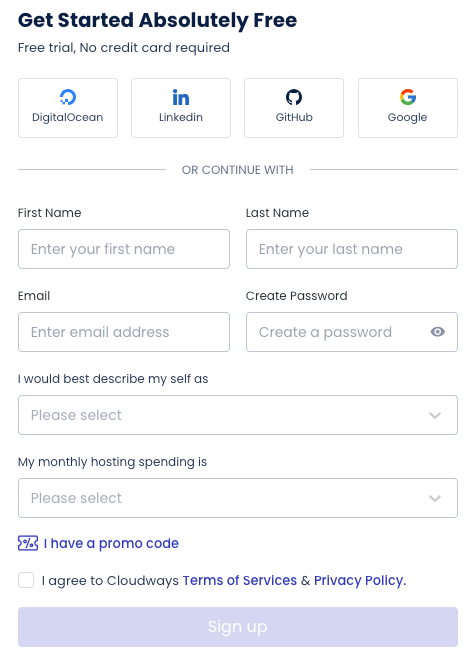
Create Your Cloudways Account
First of all, create a Cloudways account. To do this, sign up with a username and password. There’s also an option to opt for a three day trial with Cloudways.
Launch a Server
After clicking on START FREE, a welcome screen will appear. A moment later, a simple dashboard opens up showing the LAUNCH button. This is the main screen where you can look at servers specs, applications, tools, and plugins (that you may have bought and need to integrate).
Clicking the LAUNCH button will take you to the next page where you’ll have to enter your requirements. I know it sounds technical, but this is where I found Cloudways keeping things simple.
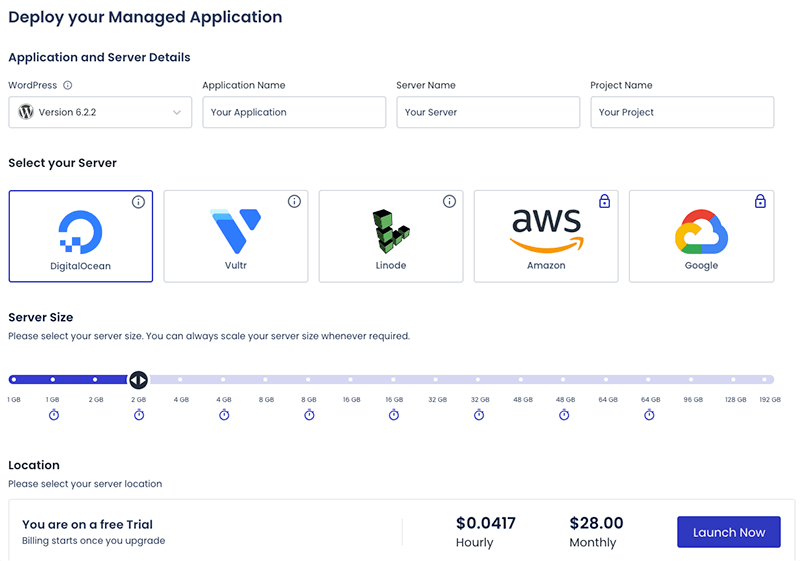
Set Server and Application Parameters

Now, you’ll have to select WordPress 5.2.2 from the drop-down menu under Application & Server Detail. For ease of managing multiple applications and servers, you can name your Managed App, Managed Server, and call it a project. Naming projects helps in organizing workflows.
In the next section, you’ll see five providers Cloudways has partnered with. I have selected the DigitalOcean’s server here, and kept my server size at a minimum. I wanted to test out the theme, so I just set up a basic server.
I set the location of my server to London, as that was closer to my location. The closer the server is to the end-user, the better the performance.
Now, click on the LAUNCH NOW button on the bottom right corner and the server setup process will initiate. The next window should say, it takes about seven minutes to set up your server.
Wait for Cloudways to Add the Server
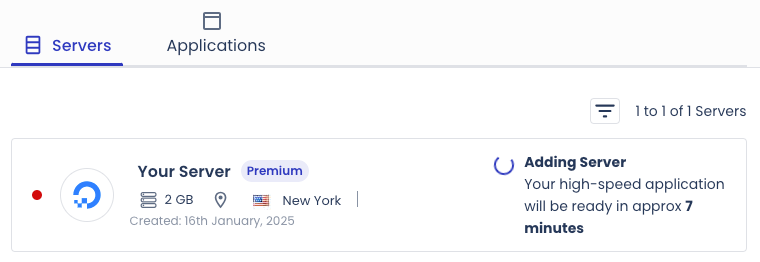
Clicking on the message shows the status of the setup. Once the setup is complete, you’re ready to get onto the next task of deploying the web application.
Access your Application
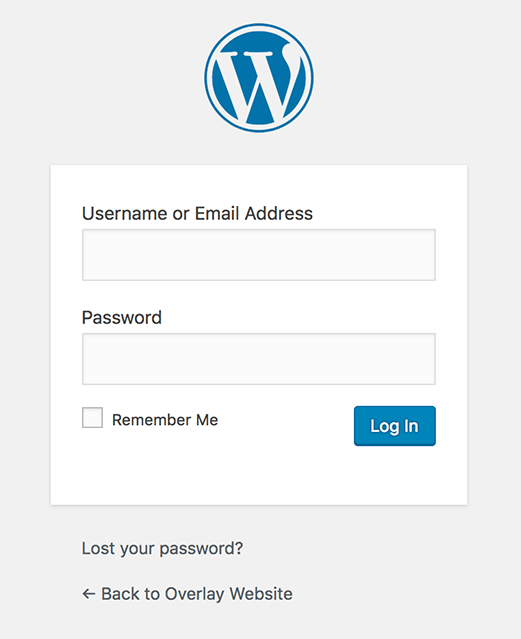
Navigate to the Application Details and access the web app. To do this, you’ll have to click on the URL provided in the Admin Panel and use the username and password to access it.
Clicking on the link will take you to a webpage that looks like this. It’s a WordPress site that’s asking for a username and password. Enter the credentials into the WordPress login window and you’ll now gain access to the WordPress Application.
Using Overlay with Cloudways: Installing the Overlay Theme on WordPress
Now, it’s time to install the theme and use Overlay with Cloudways hosting. To do this, you must select Appearance from the menu bar and then select Themes
Here, you can see the installed themes that are available. By default, you’ll see the Twenty Nineteen theme installed and activated. In the search bar above, search for the Overlay theme.
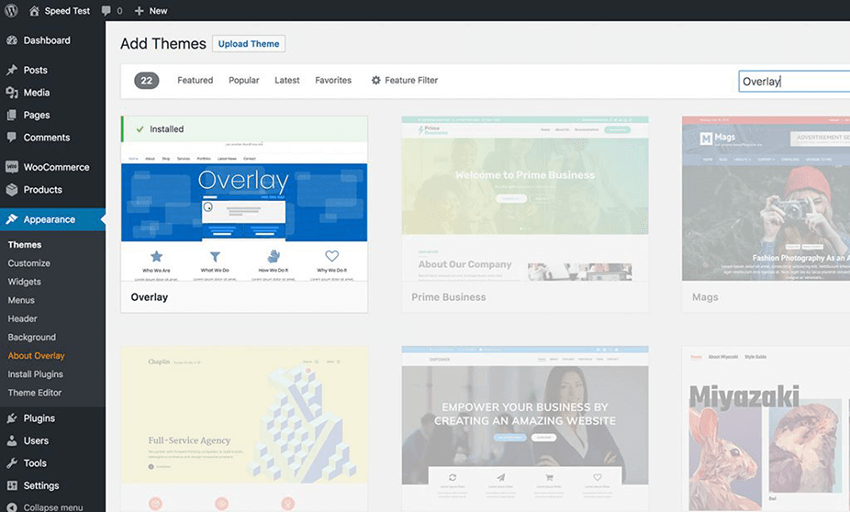
After the installation, you’ll see the Activate button. Click on that to enable the theme. If you wish to have a glance at how your website looks with the theme, you can click the Preview button.
You have successfully installed and activated the Overlay Theme.
Now that you have understood the installation process of this theme, let’s have a look at the website performance stats with and without the Overlay theme. I’ve picked OceanWP as a benchmark, as it’s a great theme based on user reviews and its rating.
Measuring the Theme’s Performance
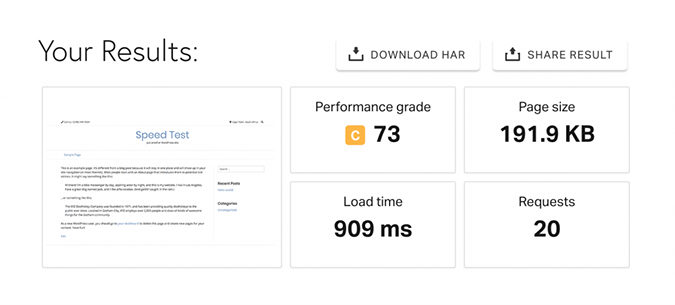
The first screenshot shows the performance of the Overlay theme as default. The factors that we’ve taken into account are page load time, which is under 1 second and the size of the page which is under 1mb on a simple skeleton website.
As Overlay is an advanced theme and offers a lot of functionality and customization settings, so it has more http requests, this we would like to reduce to achieve a better load performance.
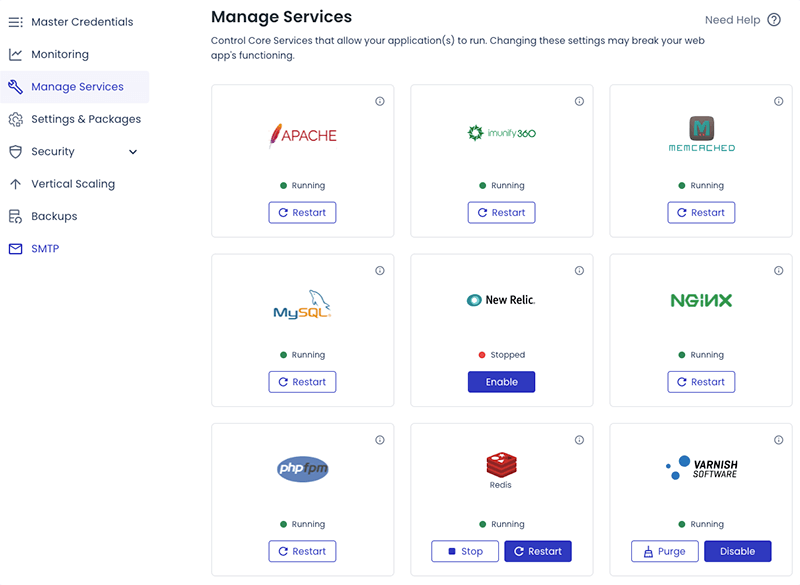
Introduce Breeze, a WordPress plugin that is active by default when you use Cloudways.
It improves your website’s performance significantly by decreasing the page size and increasing the website’s page load time. It is great for reducing http requests by combining files and minifying then so they are a lot quicker to load.
See below, with the Breeze plugin active and with a bit of configuration, we are now achieving a great performance grade with much less http requests.
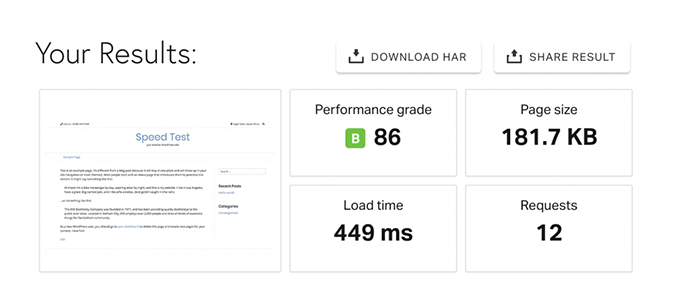
Yes, that’s right… half a second to load the page 🙂
Results prove that using our Overlay theme greatly increases the website’s performance when we’ve installed the Breeze cache plugin. The plugin directly impacts, website’s performance grade and decreases the load on the server.
After testing Breeze, I would say that it’s such a simple plugin that makes a big difference… It feels extremely lightweight which is what I love 🙂