Are you having trouble uploading images or other files to your WordPress media section or WordPress posts or pages?
This is most likely because your Maximum upload file size is set to a lower limit.
You can view your upload limit amount by going to Media -> Add New in your WordPress Dashboard.
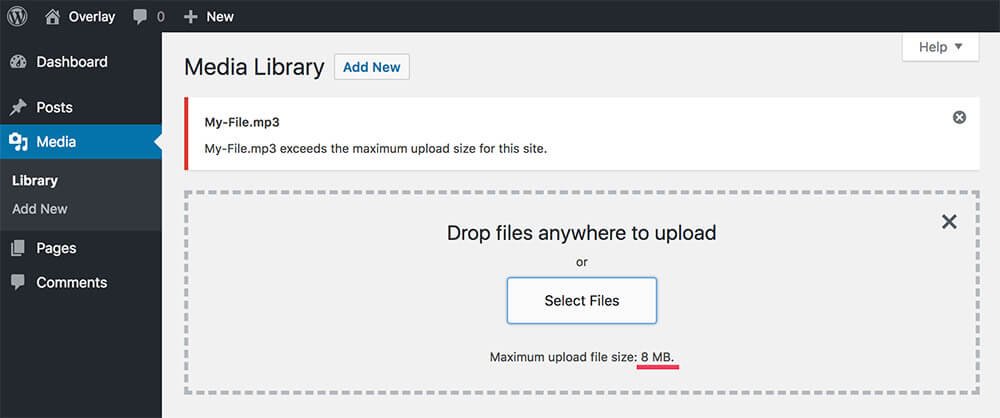
By default, the maximum upload size in WordPress ranges from 8MB to 150MB (usually), depending on the settings your hosting provider has given for your hosting package.
Most of the time this upload limit will need to be increased as to not run into any upload errors when uploading larger images or videos to your website.
Why Increase WordPress File Upload Limits?
The default WordPress upload limits can sometimes be a bit restrictive for common use cases such as:
- High-resolution images for photography portfolios
- Video content and tutorials
- PDF documents like product catalogs
- Backup files and site migrations
- Design files for client collaboration
- Educational materials and course content
Increasing these limits allows you to fully utilize WordPress as a content management system without needing an external file hosting service.
How to increase the allowed File Upload Size
As there are a few different ways to increase this limit… These are the 5 ways we think are easiest… That we’d recommend you try.
Contact Your Hosting Provider:
This is the easiest and our most recommended way of increasing the maximum file upload size limit, as some times the host might not let you adjust this manually by the other methods we mention here.
We suggest contacting your hosting provider and they will easily be able to increase this limit for you, without any hassle.
If you’re managing your own hosting and have access to the control panel, then you should be able to log in and do this yourself, otherwise you can open a ticket or chat to the provider to help you with this.
Edit your functions.php file:
Another option is to simply add some code to your functions.php file and that will increase the limits. For this, it’s recommended to create a child theme and then add the code so that the changes are not lost if/when you update your theme.
Read more on Child Themes:
https://developer.wordpress.org/themes/advanced-topics/child-themes/
This option will only work on the current theme you have activated, if you change themes then you will need to add this to the new theme again.
Add the following code to your functions.php file
@ini_set( 'upload_max_size' , '256M' );
@ini_set( 'post_max_size', '256M');
@ini_set( 'max_execution_time', '900' );
This option will not always work, it depends if your hosting provider allows these changes to be made from the code.
Edit PHP.ini file:
Generally if you are on shared hosting, you will not see the php.ini file on the server, in your root directory.
If you are able to, then do a search for each of the following lines within the php.ini file and increase the values to what you need.
upload_max_filesize
post_max_size
max_execution_time
On some servers this will take effect immediately, but on other servers it may take longer to show as the server might be caching the files.
To see if the changes have taken effect go back to your Media -> Add New in your Dashboard and and refresh the page.
upload_max_filesize = 256M
post_max_size = 256M
max_execution_time = 900
Edit the .htaccess file:
Again, depending on your hosting provider, you can try increasing the maximum upload limit by editing your .htaccess file which is on the server, in the root folder on your server.
Open the .htaccess file and add the following code:
php_value upload_max_filesize 64M
php_value post_max_size 128M
php_value memory_limit 256M
php_value max_execution_time 300
php_value max_input_time 300
Use a WordPress Plugin:
Some users might find it daunting, or simply just prefer to use a WordPress plugin to increase the maximum file upload limit.
Big File Uploads is the top plugin recommended for increasing the limit, with basic settings you should be able to easily do this from within your WordPress Dashboard.
Using one of these method, you should be able to successfully increase this limit so you can upload larger images or files to your WordPress website.
If you’re still not able to do this or 100% sure on doing this yourself then the best option is to contact your hosting provider and they will definitely be able to sort this out.
Is It Safe to Increase the Upload Limit?
Increasing upload limits can be safe when implemented correctly, but requires careful consideration of several factors.
While it offers benefits like smoother workflow for content creation and better user experience for admins or anyone uploading files, there are potential risks to consider. These include increased server storage usage, potential loading or performance impacts with large files, higher storage costs, and possible security vulnerabilities if not properly configured.
Only increase limits to necessary levels… And we recommend to always try to keep file sizes as small as possible.