How to Add Custom CSS Classes to Navigation Menu Items in WordPress
Adding custom CSS classes to WordPress navigation menu items allows you to style your menus precisely the way you want. Whether you’re customizing your site’s design, highlighting specific menu items, or adding interactive effects, this is an essential WordPress feature to understand.
In this step-by-step guide, you’ll learn how to enable and use the CSS Classes option in WordPress menus to give your site a unique look.
Why Add Custom CSS Classes to Navigation Menu Items?
Custom CSS classes give you full control over individual menu items’ appearance. By assigning a CSS class to a menu item, you can:
- Highlight a specific menu item, such as “Home” or “Contact.”
- Apply unique hover effects or animations.
- Customize menu items for different screen sizes (responsive design).
- Add icons or badges to menu items.
This flexibility ensures that your website looks polished and professional while improving user experience.
Step-by-Step Guide: Adding Custom CSS Classes to WordPress Menus
Follow these steps to add your own custom CSS classes to navigation menu items:
1. Navigate to the Menus Page
First, log in to your WordPress admin dashboard. Go to: Appearance → Menus.
This is where you can create and manage your website’s navigation menus.
2. Open the Screen Options
In the top right corner of the screen, locate the Screen Options tab. Click it to expand the drop-down menu.

3. Enable CSS Classes
Within the Screen Options menu, find and check the box labeled CSS Classes. This step enables the option to add custom CSS classes to your menu items.
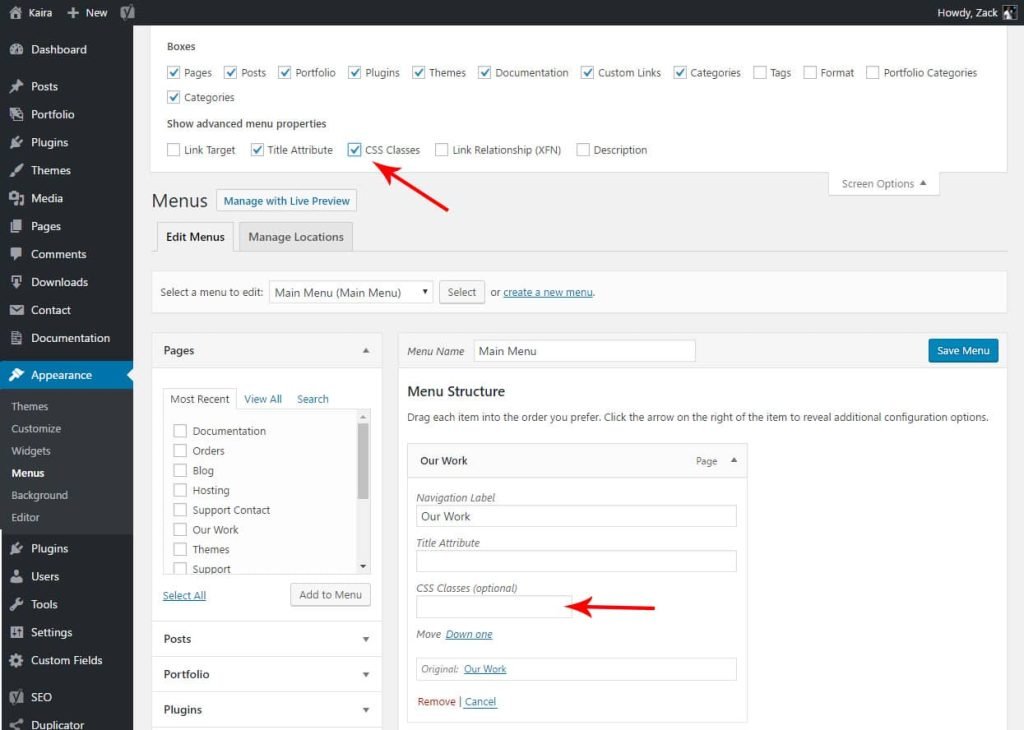
4. Add Custom CSS Classes to Menu Items
Once you’ve enabled the CSS Classes option, scroll down to your menu items. You’ll notice a new field labeled CSS Classes (optional) under each menu item.
- Click the down arrow next to any menu item to expand its settings.
- Enter the name of your custom CSS class in the CSS Classes (optional) field.
5. Save Your Menu
After adding the CSS classes, scroll down and click Save Menu to apply your changes.
6. Add Your Custom CSS
Once that’s done, the next step is to define the styles for your custom CSS classes.
Go to: Appearance → Customize → Additional CSS or edit your child theme’s stylesheet if you’re comfortable with code and customize the menu item as you want.
If you need help or advice on anything with custom code then please don’t hesitate to get in contact.